| |||||||||||||||||
| |||||||||||||||||
| |||||||||||||||||
|
Sunday, January 17
Read for Roughneck! Help Raise Money for Medical Care


Wednesday, December 30
How to Downsize Your Living Space
We have no shortage of projects going around here at any given time. From writing books to house projects, closing our primary business and dealing with medical issues, we've got a lot to do. But one of our biggest projects is to downsize our lives from our 1,400 square foot house to what will be our new home: a Tiny House on a 24' trailer.
Most of you are not planning on making such a drastic life change as we are, but the more I talk to people the more I realize that just about everyone can benefit from some sort of downsizing. Whether it is a closet that is bursting at the seams, getting ready for a move or a new addition to the family, there is almost always something taking up valuable space that shouldn't be.
What is downsizing?
The basic idea of downsizing is to reduce the amount of something that you deal with on a regular basis. This often takes the form of excess items cluttering shelves, closets and cabinets, but it can also come in the form of unhealthy relationships, a too-full schedule or anything else that seems to be draining your time, space or energy. In theory, downsizing is simple. Identify what you have too much of and get rid of it.
But how do I do it?
The nuts and bolts of downsizing can be terrifying. We, for example, are on a mission to simplify our lives to free our finances and improve our health. At present, we are living the "American Dream" in a 3 bedroom, 2 bathroom home. We have owned our own business for 5 years, so in addition to all of our daily living items we also have a ton of office equipment and inventory shoved in every corner. It is a mess! But we are committed to sloughing off the excess and getting to where everything we own fits on a 24' trailer, and inside a 13' storage unit. That means that we have about 900 sqft. of stuff that has to be sold or given away.
There is a lot going into our downsizing project, but we have picked up a few great tips that have gotten us through the panic of parting with our stuff. Maybe they'll help you clean out your own broom closet.
Most of you are not planning on making such a drastic life change as we are, but the more I talk to people the more I realize that just about everyone can benefit from some sort of downsizing. Whether it is a closet that is bursting at the seams, getting ready for a move or a new addition to the family, there is almost always something taking up valuable space that shouldn't be.
What is downsizing?
The basic idea of downsizing is to reduce the amount of something that you deal with on a regular basis. This often takes the form of excess items cluttering shelves, closets and cabinets, but it can also come in the form of unhealthy relationships, a too-full schedule or anything else that seems to be draining your time, space or energy. In theory, downsizing is simple. Identify what you have too much of and get rid of it.
But how do I do it?
The nuts and bolts of downsizing can be terrifying. We, for example, are on a mission to simplify our lives to free our finances and improve our health. At present, we are living the "American Dream" in a 3 bedroom, 2 bathroom home. We have owned our own business for 5 years, so in addition to all of our daily living items we also have a ton of office equipment and inventory shoved in every corner. It is a mess! But we are committed to sloughing off the excess and getting to where everything we own fits on a 24' trailer, and inside a 13' storage unit. That means that we have about 900 sqft. of stuff that has to be sold or given away.
There is a lot going into our downsizing project, but we have picked up a few great tips that have gotten us through the panic of parting with our stuff. Maybe they'll help you clean out your own broom closet.
- Identify Small, Easy Problem Areas
Everybody has a junk area of their house. It's where you drop the things that don't have a designated home, temporary projects that you plan on getting to later, bills you're trying to ignore, spare charging cables, toothpicks, and random bits of broken things you can't seem to throw away. The first step in downsizing is to find those stashes in your house and get rid of the clutter. Clearing out a junk drawer or organizing a dump-all shelf may only take you 15-30 minutes but it will give you an emotional boost and encourage you to take on bigger projects. You can do this! - Pick One Project
Whenever I stop and look around the house at the piles of toys, eBay listings, laundry, furniture, art, DVD's, gaming consoles... I have a minor panic attack when I try to figure out how we are going to get rid of all of this stuff. Where is it going to go? How do I know what it's worth? Should I just toss it in the yard and set it on fire?
In the larger picture of downsizing, you've got to put on some blinders. Ignore the bigness of your goal and simply pick one project. This week, my husband and I cleaned out our master closet. We spent a couple of hours going through each article of clothing. We had a pile for selling on eBay, a pile for donations, and a pile for giving away to friends. Any item that we decided should not return to the closet landed in one of those three piles. In the end, we emptied 2/3 of the closet and we both feel so great about what we've accomplished. - One In, Two Out
Downsizing doesn't have to be done overnight, and to do it right you should really take your time. If you are having difficulty getting started, simply make a promise to yourself that whenever you buy something new, you will get rid of two things you already own. Not only will this help to lesson the load of things you own in the long run, but you will be more careful about what you bring into the house in the first place. - Choose Quality over Quantity
When you are going through your things, you will often find that you have multiples of certain items. For me, it was kitchen utensils. I had so many different kinds of spoons, servers, strainers and other gadgets it was ridiculous. Whenever I had multiples of the same item, I decided that I would only keep ONE. I always choose the one that is in the best repair and is the most comfortable to use because chances are, that's the one I usually use anyway. As a bonus to this idea, when I had a drawer full of ladles, spoons and spatulas that were all in disrepair, I recycled them all and replaced them with a new single matched set. Not only does the new set look and feel great when I'm cooking, it takes up way less space than all the junk I had before.
Friday, September 4
The Casual Couch
After 8 years of pets, parties and children our couch was looking pretty shabby. I wanted to spruce up our living room but there was just no way that I could afford to replace it so I decided to make some slip covers for the cushions and pillows.
I wracked my brain for how best to cover the couch since fabric can be so expensive as well. I was rummaging around my office for ideas and stumbled across my growing pile of my husband's t-shirts and pants that needed mending... and that's when inspiration struck. I could knock out two projects at once!
My husband's shirts were just the right size to cover the large pillows on our couch (with some modification, of course), and the four pair of ruined jeans I had in the pile were a great start to making durable, removable cushion covers that would stand up to our active couch life. And so the "Casual Couch" was born!
I won't pussyfoot around - it was a LOT more work than I thought it would be going in. All in, I think I used 14 pair of the largest men's jeans I could find (I saved a load of money by picking up jeans at GoodWill with 50% off tags) and 10 t-shirts. I also have about 45 hours invested in the cutting, sewing and assembling of this couch. BUT, the end result was well worth the efforts!
Here is how I did it:
Step 1: Gather a boatload of materials.
As I mentioned above, I used 10 t-shirts to cover our ten pillows and about 14 pairs of men's jeans for the cushions. The pillows were easy to figure out how much fabric I needed, but the cushions took a couple of extra trips to Goodwill over what I thought I needed originally. Do your best to measure your own pillows and cushions, but be aware that you may not get it right the first time.
Step 2: Cover those pillows!
Covering the pillows was pretty easy, and only took me a couple of hours to complete. Here is how I did it.
1) Lay out a t-shirt as flat as you can get it. Lay your pillow on top of the shirt and using pins to catch both the top & bottom fabric, mark where your seam needs to be.




I wracked my brain for how best to cover the couch since fabric can be so expensive as well. I was rummaging around my office for ideas and stumbled across my growing pile of my husband's t-shirts and pants that needed mending... and that's when inspiration struck. I could knock out two projects at once!
My husband's shirts were just the right size to cover the large pillows on our couch (with some modification, of course), and the four pair of ruined jeans I had in the pile were a great start to making durable, removable cushion covers that would stand up to our active couch life. And so the "Casual Couch" was born!
 |
| It's done! The cat loves it, and we do too. |
I won't pussyfoot around - it was a LOT more work than I thought it would be going in. All in, I think I used 14 pair of the largest men's jeans I could find (I saved a load of money by picking up jeans at GoodWill with 50% off tags) and 10 t-shirts. I also have about 45 hours invested in the cutting, sewing and assembling of this couch. BUT, the end result was well worth the efforts!
Here is how I did it:
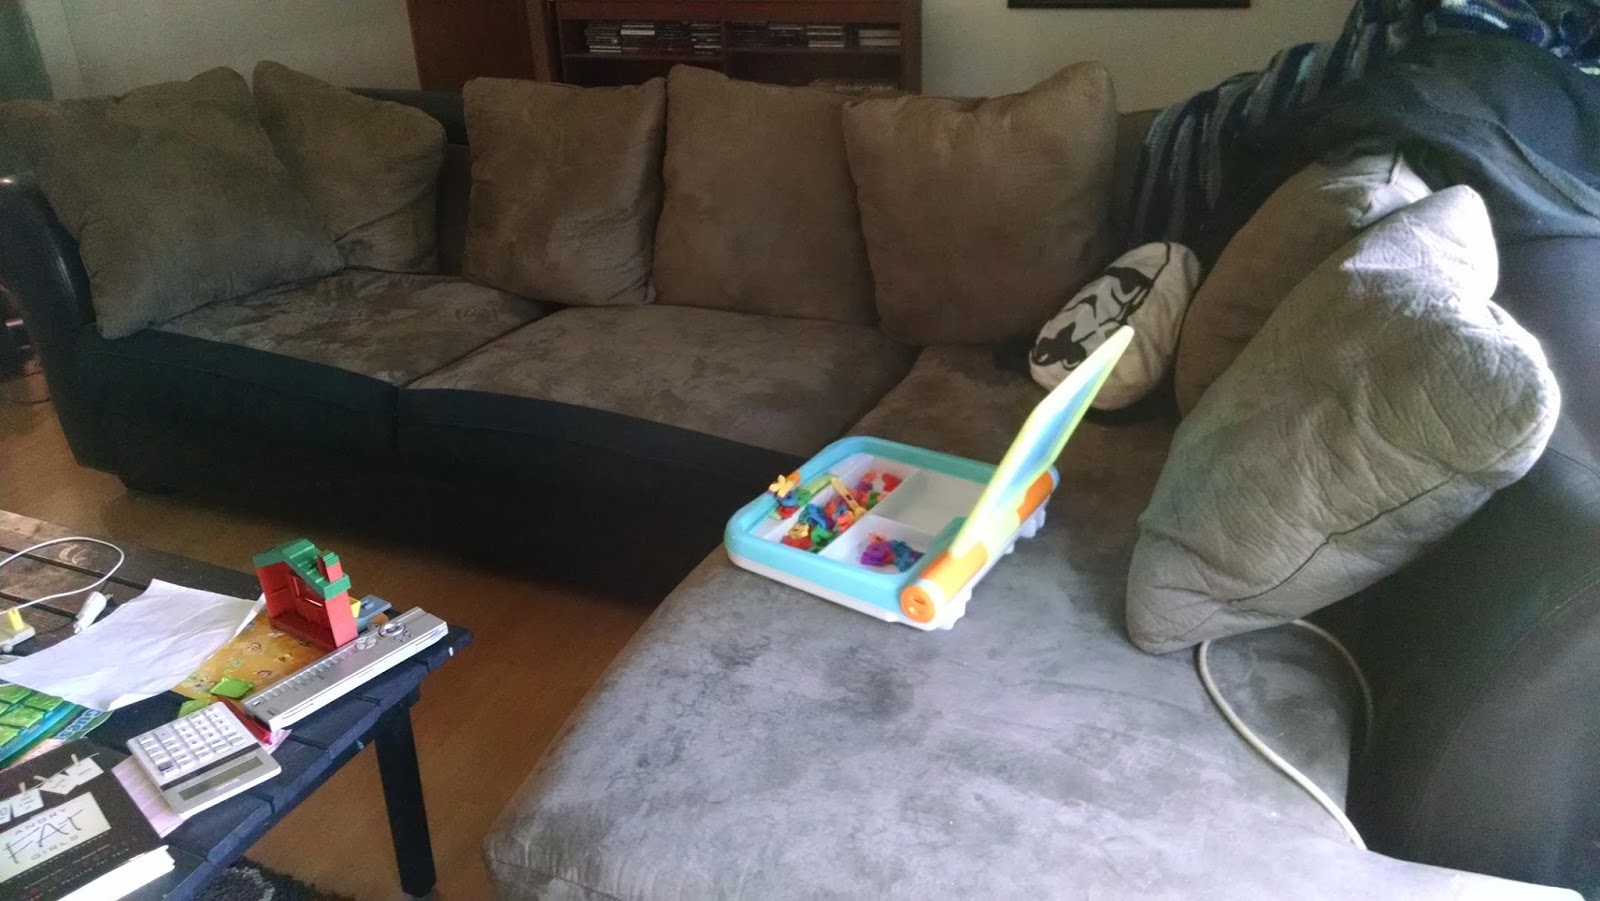 |
| How the couch used to look. |
As I mentioned above, I used 10 t-shirts to cover our ten pillows and about 14 pairs of men's jeans for the cushions. The pillows were easy to figure out how much fabric I needed, but the cushions took a couple of extra trips to Goodwill over what I thought I needed originally. Do your best to measure your own pillows and cushions, but be aware that you may not get it right the first time.
Step 2: Cover those pillows!
Covering the pillows was pretty easy, and only took me a couple of hours to complete. Here is how I did it.
1) Lay out a t-shirt as flat as you can get it. Lay your pillow on top of the shirt and using pins to catch both the top & bottom fabric, mark where your seam needs to be.

2) Remove the pillow, and cut about 1/2" around the outside of your pinned area. Sew your 1/2" seam using a zig-zag stitch. You may find that sometimes the sleeve or neck cut of the shirt impedes your desired seam. A couple of easy fixes for this - some shirts I just trimmed the sleeve to size and sewed them shut. Shirts with low necklines, I left the neck hole on the shirt and covered the opening with a contrasting color of fabric.

3) Turn the sewn fabric inside-out and put it on your pillow!

4) Repeat, repeat, repeat!
 |
| Just some of the awesome shirts I scalped for this project. |
Step 3: Start making a sea of denim fabric to cover your cushions.
1) Decide how wide you want your patchwork to be. I did my strips 12" wide, and as long as the pant legs would allow. Some pieces were only 8" because of their placement, some were as long as 30" because the jean legs were wide. I liked that I had so much variety in the lengths so that the "fabric" was broken up visually.
2) Start cutting! Pin your denim strips end to end. I cut up jeans 3 pair at a time and alternated color as I pinned my pieces together to make the fabric look more interesting.

3) Sew 1/2" seams.

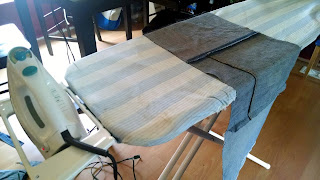
4) Iron your seams flat and stitch them down. I sewed about 1/4" away from the seam and used a variegated orange thread on my bobbin so that the face of the fabric would have a colorful stitch against the blue fabric.


5) Once you have a long run of fabric, test fit it to see how many runs you will need to cover the width of your cushion.
 |
6) Sew several runs together to make your fabric. Don't forget to iron and sew the seams between each run the same way you have been ironing flat and sewing the seams between each denim piece.

7) Once you have enough fabric to cover the top/bottom of your cushion, cut strips to the height and length needed for the sides. Lay the fabric on your cushion, inside-out, and pin the side pieces to your existing fabric. Remove from the cushion and sew! (Why don't I have a photo of this? I imagine it's because I couldn't hold the camera and pull my hair out at the same time.)
8) Pin and finish the hem for the back side of your cushions. I am tying the back of the covers with strips of leftover inseam cut from the jeans I used, so I didn't worry too much about the gap at the back.

9) Turn inside-out and put it back on your cushion!

10) Attach your tie straps to the rear of the cushion to hold everything in place.
Word of warning: This project is really going to be more work than you think it could ever be. But I promise you that the effort is worth it. The extra layers of fabric don't seem like much, but they make the couch so much more comfortable. Having truly removable cushions that you can throw in the washing machine without worry is 100% awesome. And if you want to add some foam between the cushion and your cover, just allow yourself some extra room to do so while sewing.
All in, because I purchased cheap worn jeans at GoodWill, only choosing those with 50% off tags, I spent under $50.00 on this entire project.
Subscribe to:
Posts (Atom)