I wracked my brain for how best to cover the couch since fabric can be so expensive as well. I was rummaging around my office for ideas and stumbled across my growing pile of my husband's t-shirts and pants that needed mending... and that's when inspiration struck. I could knock out two projects at once!
My husband's shirts were just the right size to cover the large pillows on our couch (with some modification, of course), and the four pair of ruined jeans I had in the pile were a great start to making durable, removable cushion covers that would stand up to our active couch life. And so the "Casual Couch" was born!
 |
| It's done! The cat loves it, and we do too. |
I won't pussyfoot around - it was a LOT more work than I thought it would be going in. All in, I think I used 14 pair of the largest men's jeans I could find (I saved a load of money by picking up jeans at GoodWill with 50% off tags) and 10 t-shirts. I also have about 45 hours invested in the cutting, sewing and assembling of this couch. BUT, the end result was well worth the efforts!
Here is how I did it:
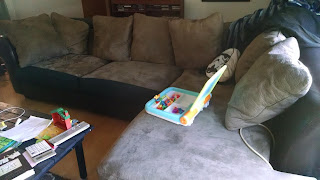
 |
| How the couch used to look. |
As I mentioned above, I used 10 t-shirts to cover our ten pillows and about 14 pairs of men's jeans for the cushions. The pillows were easy to figure out how much fabric I needed, but the cushions took a couple of extra trips to Goodwill over what I thought I needed originally. Do your best to measure your own pillows and cushions, but be aware that you may not get it right the first time.
Step 2: Cover those pillows!
Covering the pillows was pretty easy, and only took me a couple of hours to complete. Here is how I did it.
1) Lay out a t-shirt as flat as you can get it. Lay your pillow on top of the shirt and using pins to catch both the top & bottom fabric, mark where your seam needs to be.
2) Remove the pillow, and cut about 1/2" around the outside of your pinned area. Sew your 1/2" seam using a zig-zag stitch. You may find that sometimes the sleeve or neck cut of the shirt impedes your desired seam. A couple of easy fixes for this - some shirts I just trimmed the sleeve to size and sewed them shut. Shirts with low necklines, I left the neck hole on the shirt and covered the opening with a contrasting color of fabric.
3) Turn the sewn fabric inside-out and put it on your pillow!
4) Repeat, repeat, repeat!
 |
| Just some of the awesome shirts I scalped for this project. |
Step 3: Start making a sea of denim fabric to cover your cushions.
1) Decide how wide you want your patchwork to be. I did my strips 12" wide, and as long as the pant legs would allow. Some pieces were only 8" because of their placement, some were as long as 30" because the jean legs were wide. I liked that I had so much variety in the lengths so that the "fabric" was broken up visually.
2) Start cutting! Pin your denim strips end to end. I cut up jeans 3 pair at a time and alternated color as I pinned my pieces together to make the fabric look more interesting.
3) Sew 1/2" seams.
4) Iron your seams flat and stitch them down. I sewed about 1/4" away from the seam and used a variegated orange thread on my bobbin so that the face of the fabric would have a colorful stitch against the blue fabric.
5) Once you have a long run of fabric, test fit it to see how many runs you will need to cover the width of your cushion.
 |
6) Sew several runs together to make your fabric. Don't forget to iron and sew the seams between each run the same way you have been ironing flat and sewing the seams between each denim piece.
7) Once you have enough fabric to cover the top/bottom of your cushion, cut strips to the height and length needed for the sides. Lay the fabric on your cushion, inside-out, and pin the side pieces to your existing fabric. Remove from the cushion and sew! (Why don't I have a photo of this? I imagine it's because I couldn't hold the camera and pull my hair out at the same time.)
8) Pin and finish the hem for the back side of your cushions. I am tying the back of the covers with strips of leftover inseam cut from the jeans I used, so I didn't worry too much about the gap at the back.
9) Turn inside-out and put it back on your cushion!
10) Attach your tie straps to the rear of the cushion to hold everything in place.
Word of warning: This project is really going to be more work than you think it could ever be. But I promise you that the effort is worth it. The extra layers of fabric don't seem like much, but they make the couch so much more comfortable. Having truly removable cushions that you can throw in the washing machine without worry is 100% awesome. And if you want to add some foam between the cushion and your cover, just allow yourself some extra room to do so while sewing.
All in, because I purchased cheap worn jeans at GoodWill, only choosing those with 50% off tags, I spent under $50.00 on this entire project.


